How to restore files, email, and databases using JetBackup
This article demonstrates how to use JetBackup to quickly and easily restore:
- Files.
- Email accounts.
- MySQL databases.
JetBackup is integrated with cPanel, which makes it easy to access and use. Follow the procedures below to restore your files, email accounts, and MySQL databases.
Table of Contents
Restoring files
To restore your site's files using JetBackup, follow these steps:
- Log in to cPanel.If you do not know how to log in to your cPanel account, please see this article.
- On the Tools page, in the Files section, click JetBackup 5:
 If you do not see the JetBackup 5 icon in cPanel, then your account uses Server Rewind for backups instead. For more information about how to restore files using Server Rewind, please see this article.
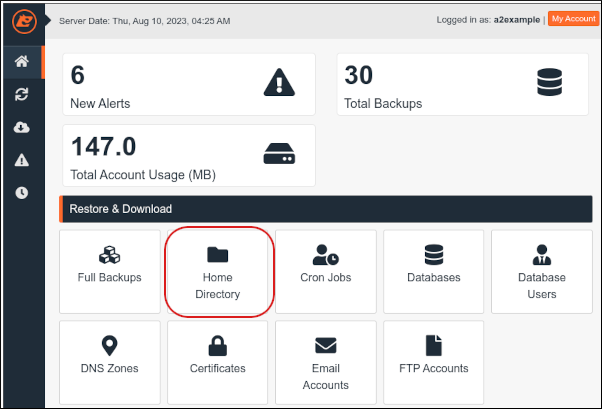
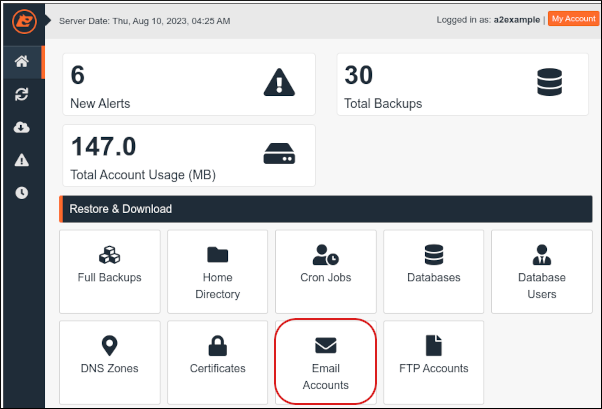
 After a few seconds, the JetBackup dashboard appears. Click Home Directory:
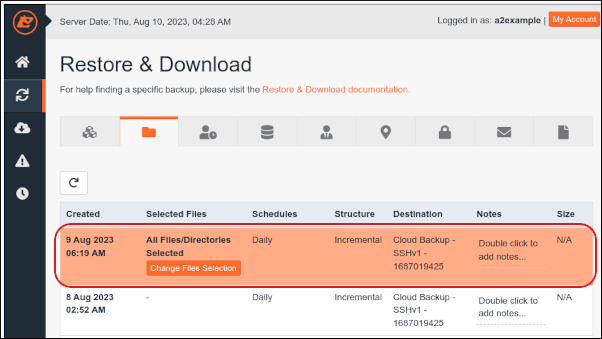
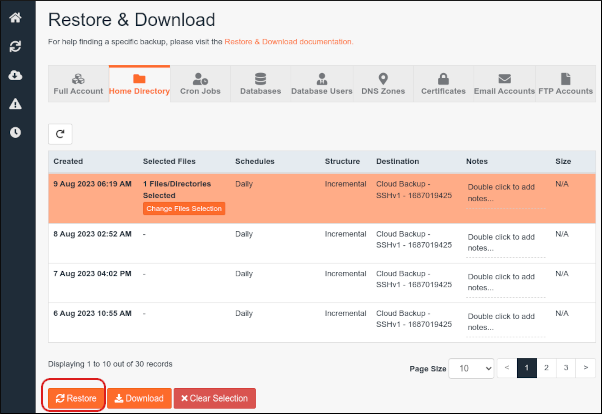
Click the backup from which you want to restore files:
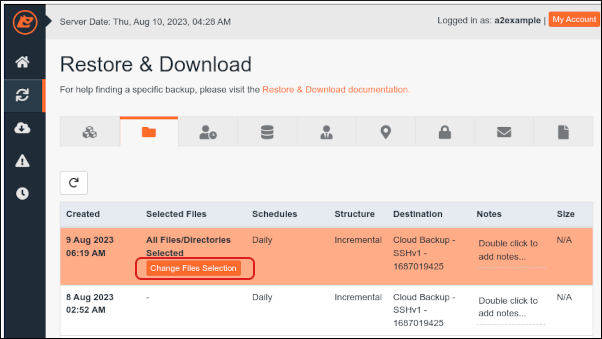
Click Change Files Selection:
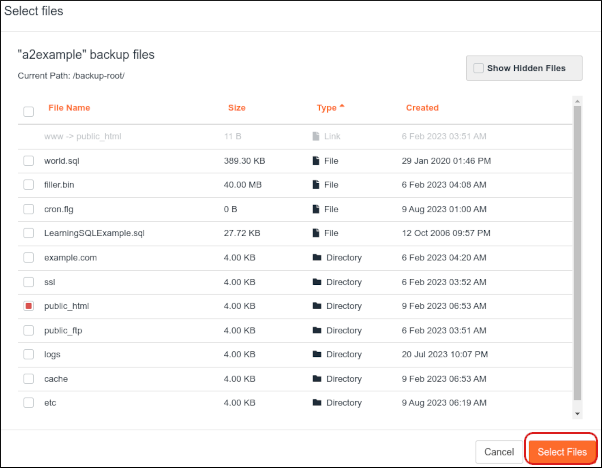
Click the folder or folders you want to restore. You can also select individual files to restore as well:
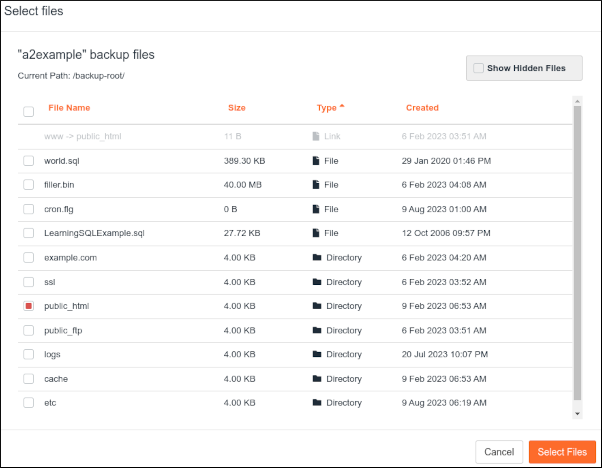 For example, if your web site files are stored in the public_html folder, then select public_html to restore your web site.
Click Select Files:
Click Restore:
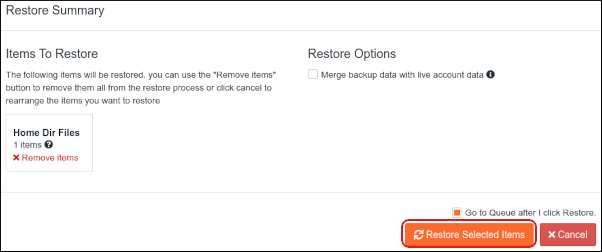
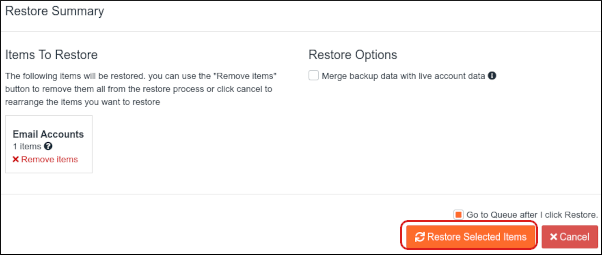
In the Restore Summary dialog box, click Restore Selected Items. JetBackup adds the selected items to the queue and starts the restore process:
Restoring email accounts
To restore your email accounts using JetBackup, follow these steps:
- Log in to cPanel.If you do not know how to log in to your cPanel account, please see this article.
- On the Tools page, in the Files section, click JetBackup 5:
If you do not see the JetBackup 5 icon in cPanel, then your account uses Server Rewind for backups instead. For more information about how to restore email accounts using Server Rewind, please see this article.
After a few seconds, the JetBackup dashboard appears. Click Email Accounts:
Click the email account or accounts you want to restore:
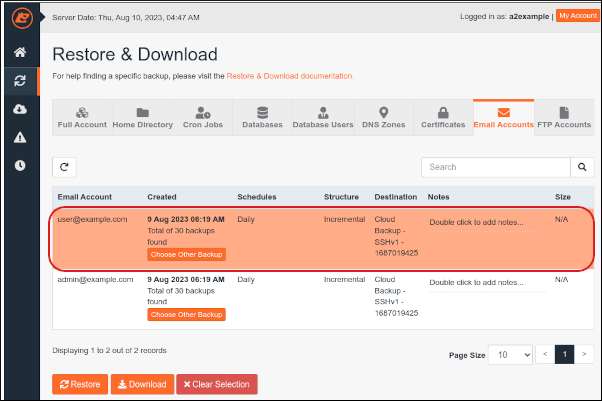
If you do not want to restore the most recent backup for the account, click Choose Other Backup, and then select the date of the backup you want to restore:

Click Restore:

In the Restore Summary dialog box, click Restore Selected Items. JetBackup adds the selected items to the queue and starts the restore process:
Restoring MySQL databases
To restore your MySQL databases using JetBackup, follow these steps:
- Log in to cPanel.If you do not know how to log in to your cPanel account, please see this article.
- On the Tools page, in the Files section, click JetBackup 5:
If you do not see the JetBackup 5 icon in cPanel, then your account uses Server Rewind for backups instead. For more information about how to restore databases using Server Rewind, please see this article.
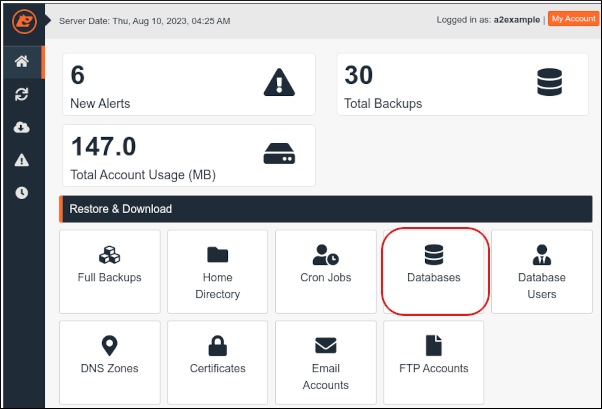
After a few seconds, the JetBackup dashboard appears. Click Databases:
Click the database or databases you want to restore:
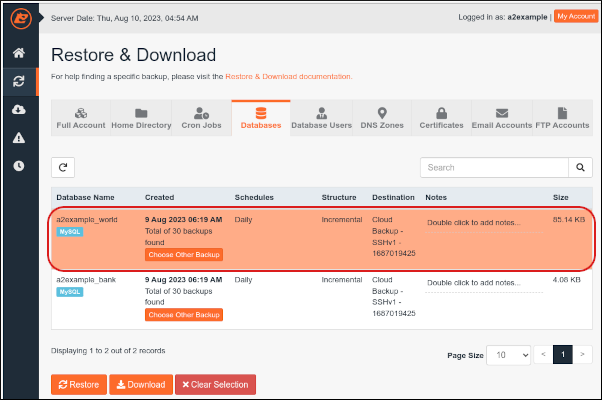
If you do not want to restore the most recent backup for the database, click Choose Other Backup, and then select the date of the backup you want to restore:
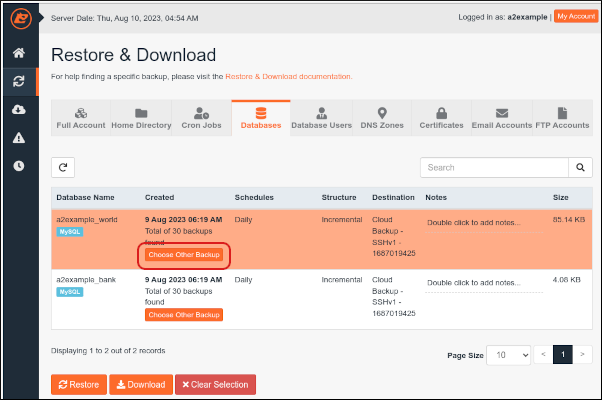
Click Restore:

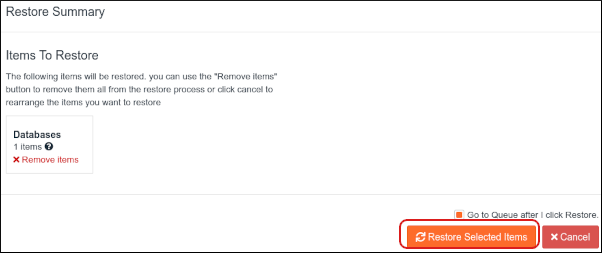
In the Restore Summary dialog box, click Restore Selected Items. JetBackup adds the selected items to the queue and starts the restore process:
Article Details
- Control Panel: cPanel
- Product: Reseller Hosting Shared Hosting
- Level: Beginner
Grow Your Web Business
Subscribe to receive weekly cutting edge tips, strategies, and news you need to grow your web business.
No charge. Unsubscribe anytime.
Did you find this article helpful? Then you'll love our support. Experience the A2 Hosting difference today and get a pre-secured, pre-optimized website. Check out our web hosting plans today.