How to install an Organization Verified SSL certificate
In order to expedite the verification process, please look up your organization name. Verifying that the information in the Dun & Bradstreet D-U-N-S® Number Lookup correlates with your data will expedite the verification process and speed up the issuance of your extended validation certificate.
You may encounter an error message stating “Your connection is not private” or something similar when attempting to visit your cPanel login page. This is caused by the login page defaulting to a self-signed certificate. Please disregard the error message and proceed.
- Log in to your control panel:
Cpanel: https://yourdomain.com:2083
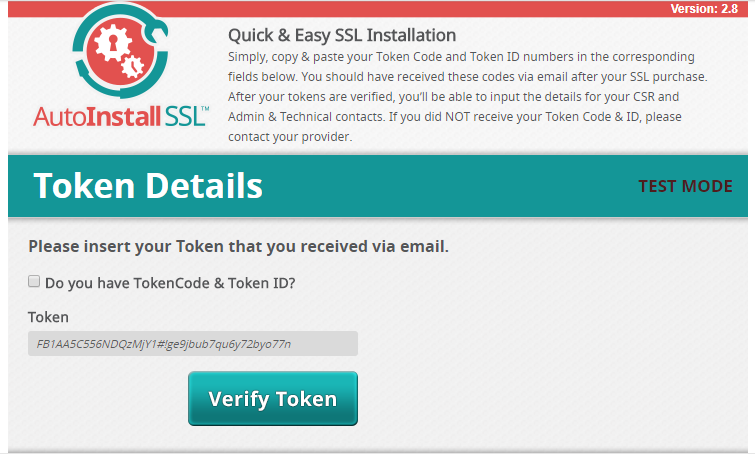
Plesk: https://yourdomain.com:8443 - As soon as the control panel loads, locate and click the AutoInstall SSL icon which will take you to the SSL Installation section.
- On this page, there will be a submission field requesting a token. Paste the token you received in your order confirmation email and click “Verify Token.”
- Upon submitting a valid token, you will be presented with an additional page that will require some info about you and the certificate:
- Adjacent to the “Domain/ Webspace,” select the domain you would like to use this SSL for.
- Select the check box adjacent to the “Would you like to use ‘www’ during the CSR generation.”
- Select the check box adjacent to the “Enable SNI for Mail Services?”
- Fill out the fields under “CSR Details,” “Admin Contact, and “Tech Contact” with your own relevant information.
- Fill out the contact information, the full legal name of the organization, and the duns number( if available) then click continue.
Note: Please verify that the information in this section is accurate as the Certificate Authority will need to contact you to verify this information.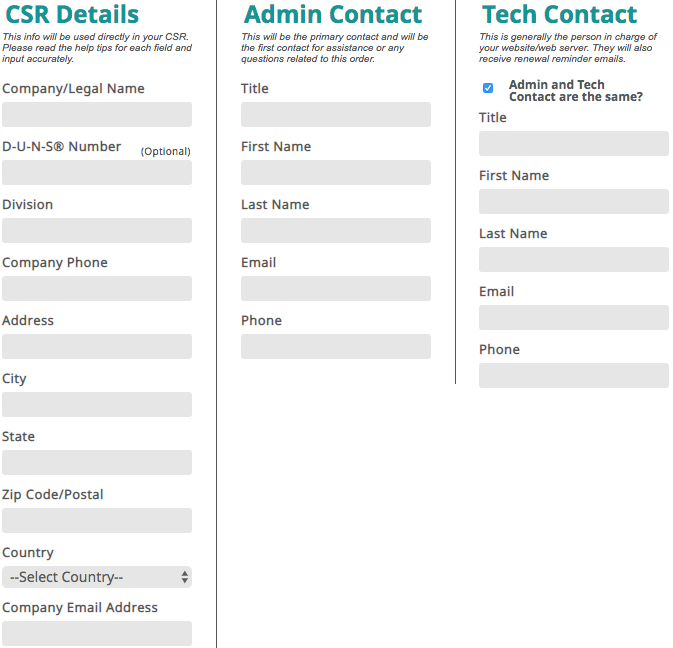
- The Information you provided will be automatically sent to the Certificate Authority for verification. You will see a screen similar to this:
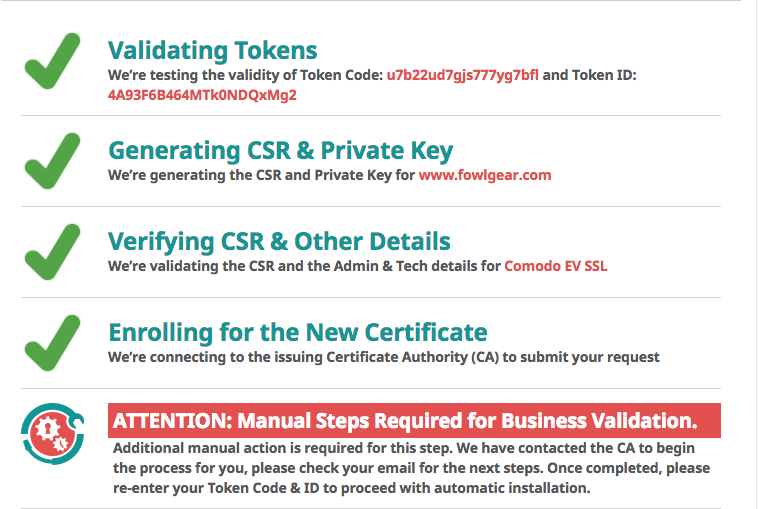
- The Certificate Authority will process the request and verify your information. This process can take up to three business days. The Certificate Authority may call or email you to verify that the provided information is accurate.
- Once the verification process is complete, you will need to re-enter your SSL Token and ID to proceed with the automatic installation.
Article Details
- Product: All accounts
- Level: Beginner
Did you find this article helpful? Then you'll love our support. Experience the A2 Hosting difference today and get a pre-secured, pre-optimized website. Check out our web hosting plans today.